Horizontal Techniques
There are a number of techniques for negotiating passageways and rooms in caves,many of these techniques for cave travel, especially in horizontal cave sections, come naturally to the caver. In this section we will describe the more common techniques, point out their important features, and present information regarding when their use is generally indicated.
In the first section of this article we will be dealing with basically horizontal caves or horizontal sections of vertical cave systems. The majority of total cave passages travelled by most cavers tend to be of the horizontal or semi-horizontal type, although in some cases these horizontal sections may be connected by pits and drops. We will then finish with information and techniques for use in more angled and sloping passages.
Walk Or Crawl
When preparing to negotiate a cave passage, the caver ordinarily studies the size of the passage and makes a decision as to what technique to employ. Passages 4 feet or more in height can be negotiated in some type of bipedal fashion. Although the caver may have to assume a stooped posture in passages approaching the 4-foot limit, walking is still the most efficient method of moving forward. Stooping posture, when required, does become tiring if the distance is great; the caver may find it less tiring if he rests his hands on his thighs or knees, thereby partially supporting his upper body. When the floor underfoot is solid, this technique of stooped travel is relatively easy; however, when the passage slopes and/ or the floor surface becomes unstable, progress becomes more difficult and tiring. In this case you may need to use your hands against the wall or roof for support, but as always, be careful not to damage any delicate formations that may be present. As in any cave progression, the caver should always plan his path ahead, and when walking he should determine where each foot will be placed both for his own benefit and for that of the cave.
If the passage narrows and decreases in height, the caver will need to change to another technique. In cases where the passage height is just under the limit where stoop-walking is possible, he may be able to squat with one leg extended slightly behind the other leg, under his body. Using the hands for balance and the hind foot for pushing, the caver makes headway in a semi-squat, semi-hopping duck-walk.
If the passage is too low for using the semi-squat position, the caver will need to resort to a crawl on all fours. The knees, although they work well for crawling short distances, are very vulnerable to injury If you expect to be crawling for considerable distances, it is wise to use knee pads. The caver who finds himself crawling on hands and knees may want to switch periodically and crawl in a butt-up fashion, using toes and hands as his points of contact. This posture is extremely tiring but is effective for short distances. He can also switch to elbows, forearms, and toes. This position allows penetration in passages of even less height. At times it is easiest to crawl on one’s side, using the forearm or hand or both, and sliding the bottom thigh forward. The action is similar to the side stroke in swimming.
When the passage becomes even tighter-that is, under 2 feet in height-the caver must resort to crawling on his stomach, this is required for many caves. Crawling is relatively simple where sufficient width of the cave passage allows the elbows to go out from and then return to the sides of the body. The caver makes his way propelled primarily by his toes and feet, pushing on nubbins and irregularities on the cave floor, and the hands also assist in pulling the caver forward. The majority of force should be exerted by the legs, which can exert the strongest force. Making headway will often be easier if the caver also wiggles his body back and forth.
Packs are taken off and pushed ahead of the caver during crawling. In some crawls the caver will need to remove his helmet and push it ahead as well. When the crawl is short, often times the first caver completing it will pull the parties’ packs through so that the remaining cavers negotiating the crawl will have it a bit easier. The caver preparing to pull the gear through can often work his way back down into the crawl feet first. At this point, packs can be looped over his foot and he can then pull them through.
Small Squeezes
How small a squeeze can a caver negotiate? This is a common question. Every caver has a slightly different physical build, so the answer varies. Most squeezes are narrow along one axis, either vertically or horizontally, whereas along the other axis the squeeze is generally wider. It is the narrow measurement that we will be discussing. The smallest size cavers normally can negotiate varies between 7 1/2 to 12 inches. A statement often made is that if a helmet can fit through a squeeze, then so can the caver. This is not always true, however.
The caver must be examined to determine the largest, boniest portions of his body; these will set the limits of his penetration through a tight squeeze. It is not generally a beer belly or heavy thighs that stop progress, but the shoulders, chest, or pelvis. Body tissue conforms well to space available in a squeeze, but not so with bones. Depending upon their build, some cavers are stopped by their upper body, while others are held back by their lower body.
There are some tricks to getting through tight crawls. First study the squeeze and determine how your body will best fit through it. Then relax and enter the squeeze. Whenever attempting a squeeze, the caver should always attempt to relax as fully as possible to help his body conform to the passage more efficiently If the shoulders are too large and inhibit progress, try putting one arm ahead and trailing the other one behind alongside the body. Many cavers negotiating squeezes find it necessary to exhale, thereby reducing the chest size by 1/2 to 1 inch. The caver then moves forward while his chest is contracted, and stops when he inhales.
In many crawls it is wise to empty your pockets of all their contents; it is surprising, but a few objects in a caver’s pockets may make the difference between success and defeat in negotiating a crawl. In some squeezes, cavers may find it necessary to strip the outer clothing off the body, as it increases thickness and overall bulk on the body as well as providing an increased source of friction in certain situations.
Getting Unstuck
Almost every caver who has caved for any length of time will at some point find himself stuck. Generally the situation is resolved very quickly and he manages to extricate himself. Being stuck often simply involves a loose piece of clothing, pack strap, or similar item that has become caught on a rock irregularity. After backing up slightly to unhook the offending piece, the caver can continue. Often times a member of the party immediately behind the trapped caver can unhook the item causing the problem.
A caver who is more seriously stuck can usually consciously relax; by doing this he becomes slightly more pliable and may work himself free. An anchored line with loops tied in it provides sound handholds for a victim to use in pulling himself free. If such a rope is run down next to his body to his feet, he can use a loop as a foothold. The use of fellow cavers to pull the victim free often works quite effectively. The above methods, singly or in combination, are almost always successful. However, if the victim is critically stuck, it is important to give him reassurance, keep him warm, and supply fluids and food while a rescue team is contacted.
Never investigate a tight, downward-sloping crawl head-first. Always begin feet first. If the squeeze ends, it is much easier to retreat head-first than it is to retreat feet first.
Climbing, Scrambling, Chimneying And Traversing
Climbing, scrambling, chimneying, and traversing are techniques that need to be learned by any serious caver, for when a cave passage becomes too steep to simply walk up or down, the caver must employ one of these methods or resort to single-rope techniques.
The difference between climbing and scrambling is a fine one with no definite boundaries. Scrambling is used on less demanding slopes or pitches than those requiring climbing. Scrambling generally does not warrant a belay (safety) rope, whereas climbing does. A belay line should be used where there is a possibility of a fall that would result in serious injury Both climbing and scrambling use many of the same techniques. Both generally use a three-point-contact climbing style. In scrambling these three points can be a number of body parts, such as hands, arms, head, back, stomach, seat, legs, feet, ankles, and so on. In climbing, the hands and feet are primary contact points.
The caver strives to have three points of contact while the fourth searches for a new hold. Only after the fourth has been engaged does the caver remove one of the previous three. The support of body weight and upward or downward progress is accomplished primarily by the legs because they are the strongest of the body parts used. The arms and hands generally accomplish balance. In climbing situations the arms and hands are sometimes used more for support and progress than they are in scrambling.
Be careful. In caves the hand and footholds are generally wet and muddy and at times quite slippery. Test your holds before applying full weight. Remember that it is usually easier to climb up than down; this is a point to remember when climbing up to check out a lead.
You will find it easier to climb up and down while facing the rock. Some novice cavers have a tendency to face outward when climbing down, which often times makes the climb more difficult, although the outward facing climb is more common in scrambling situations.
Traversing is a common mode of travel in many cave sections. This is horizontal progress around or along some feature that is to be avoided. For example, in a passage that drops severely and then proceeds upward again, the caving party may elect to traverse around its side at a higher level rather than descend and then ascend the drop, a procedure that would take much more time. Another example would be in the case of a caving party travelling a passage that changes into an active stream passage. The party may decide to traverse along one of the walls above the water until the water becomes shallow or disappears.
In most traversing, Where a narrow ledge or series of footholds is employed, the caver faces the wall, looking ahead and planning his path. He shuffles his feet, rather than crossing them one over the other, in order to prevent them from becoming entangled, causing him to lose balance. When the traverse is difficult, the caver performing the traverse should be belayed from both sides to prevent a pendulum effect in case of a fall. The first caver to traverse will have only a single belay from one side; therefore he should be the most capable individual in the party. When a traverse is difficult and a number of persons must pass, a rigged line can be set from start to finish, anchored securely at both ends. As each caver approaches the traverse he clips into the line from his seat or chest harness.
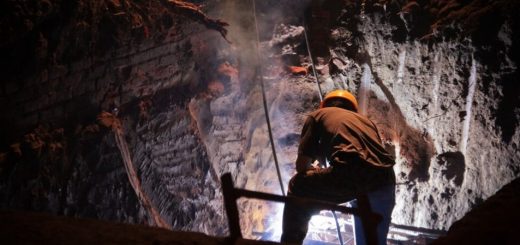
Chimneying, or “back and footing,” as the British call it, is used extensively to explore many cave systems. Generally it entails using two rock surfaces to apply opposite forces with the body, resulting in friction. Chimneying is used to move upward or downward and is usually used in narrow slots, fissures, pits, and similar locations. Applicable widths vary from 18 inches to under 4 feet, although some extremely experienced, fit cavers and climbers can chimney in widths of 5 to 6 feet. In narrow widths, the feet are placed as high up on one wall as is possible, with the back placed firmly against the Opposite wall. Due to the narrowness of the cavity, the knees are restricted and not able to move upward to any great extent. For this reason the toes provide most of the holding power on the front wall. Generally one hand is on each wall as the caver squirms his way up. Going down is easier than going up because the caver need only provide sufficient friction to allow a controlled descent.
In wider chimneys of approximately 24 inches, one foot is placed in front as before, only much higher in this case, and the other foot is placed under the caver’s rear on the wall behind. The caver still may place his back against the wall; however, the back foot takes up most of his weight. He then works his way up, one foot at a time, alternating movement in a scissors fashion. If the chimney continues to widen, the caver will position both feet on the front wall, pressing his back and seat into the wall behind.
Chimneying can be used to descend highly angled passages. To do this the caver lies down on the floor and places his feet over his head on the sloping ceiling. He can then work his way down. On slippery surfaces this may be the only feasible method to use, other than resorting to single rope technique (SRT).
Hand Line
Hand lines are short pieces of rope, or sometimes pieces of webbing, generally measuring 20 to 50 feet in length. These are used for assistance in ascending or descending. The operative word is assistance. The line lends some security and support, but is used mainly for balance. The caver should never put his entire weight on the rope. The feet and legs should support the climber.
It is extremely dangerous to attempt to go up a rope relying solely on one’s hands and arms, as they are not as strong as they appear to be and their endurance is not anywhere near that of the caver’s legs. Never climb up a vertical drop hand over hand.
Belaying
Belaying refers to the use of a safety rope connected to a caver in situations where there is danger of his falling. This provides not only increased physical security, but also increased psychological security. In the event of a fall the safety rope should arrest the fall and catch the caver.
The general belay setup includes a climber and another individual who is the belayer. The belayer is tied into a secure anchor in such a way that the tie-in is directly in line with the belay rope to the climber. In other words, if a straight line were drawn from the anchor to the belayed caver, it would pass through the belayer. This is important; if there is an angle in the line between the anchor and the climber, in the event of a fall the belayer would be forced to a position that would eliminate the angle. This could lead to injury and the possibility of losing control as the belayer would be violently shifted to this position.
The climber must be tied in securely to the rope. The tie-in must be such that it distributes any possible impact over as much body area as possible, thereby reducing the impact on any one body area in a fall. This is generally accomplished in one of two ways. In the first, the climber ties a figure 8 in the end of the belay rope and clips it into his seat or chest harness via a locking carabiner. In an alternative means of attachment, the climber ties a bowline on a coil around his waist using a three-to five-wrap coil. The additional wraps, as compared to a standard bowline, aid in distributing the possible impact over an increased area.
Body Belay
The belayer should tie into the waist strap of his sling from the rear. This connecting sling should have no slack in it. The belayer positions himself so that the sling is taut. He then takes the rope, and positions it behind him so that both ends go away from him in front. The end of the rope going to the climber comes through the belayer’s guide hand and around behind him to his control hand, positioned in front of his body. The guide hand does nothing more than simply guide the rope and keep it organized. The control hand, aided by the body’s friction, controls how fast the rope is taken up or fed out. The control hand is always the hand after the point of friction. If the climber is below the belayer, the belay rope should pass over the top of the belayer’s tie-in rope, for if a large force were exerted on the belay rope it might be pulled out under the belayer. If, however, the climber is above, and the suspected fall direction would result in an upward pull, the belay rope could be pulled over the belayer’s head. In this case the belay rope should run underneath the belayer’s tie-in.
If the belay rope is used to arrest a fall, the belayer brings his control hand and rope across his body, thereby increasing the frictional surface and hence friction.
It is important that the belayer strive never to remove his hands from the rope. When taking up slack the control hand slides up the rope next to the body, grasps it, pulls it out, and slaps it into the guide hand along with the other rope as it slides back to pick up more r0pe. The process is somewhat difficult at first, as the novice continually finds one of his hands has left the rope, which in the case of a simultaneous fall could prove disastrous. The belayer should wear gloves to prevent rope burns, which could also result in loss of control.
Practice these procedures aboveground to perfect them before going underground.
Dynamic Versus Static Belay
As in above-ground climbing, in the event of a fall a controlled dynamic belay is much preferred to a static belay. The climber who takes a fall should be stopped in a gradual deceleration rather than in a sudden, complete st0p. Too rapid a stop endangers the climber. Upon the initiation of the fall, the weight of the climber’s mass increases its acceleration and hence its falling energy. If this energy is absorbed instantly, the force will be directed to the climber’s body at the belay rope’s point of attachment and has the potential to do much damage to the body, ranging from breaking of bones to rupture of internal organs.
In a dynamic belay the falling climber is slowed down over the space of a few seconds, and the energy of falling is thereby absorbed and distributed in a controlled fashion. This can be compared to an object connected to an elastic band and dropped. Because of the elastic properties, the falling object is slowed grad. ually. This is Why belay systems almost never employ static rope; static rcpe has the same static qualities as a chain. Always use dynamic rope when belaying.
Mechanical Belays
Several mechanical devices used for belaying are available on the market. The two most common are the Stict plate and the Edelrid-Bankl plate. In use, the belay rope is threaded through one of these plates in combination with an anchored carabiner. If a fall occurs, the belayer merely pulls the rope tight through the plate against the carabiner. This movement activates the plate, which increases friction, and the rope is held.
It is their efficiency that at times makes these mechanical devices dangerous. It is the tendency of the belayer to step the rope slippage and hold the fall. When using these plates, it is often too easy for a belayer to lock up the rope completely. If the rcpe is locked up completely early in the fall, the total force will be absorbed instantly, putting extremely high stresses not only on the falling climber but also on the rigging. Tie-off anchors and other components in the system have been known to fail under these high stresses; whereas in a body belay the rope always manages to slip slightly, thereby adding to the dynamic qualities. Therefore, it is our opinion that the body belay should be the first choice when a belay is needed, unless the belayer has had sufficient practice with a plate to make safe use of it.
Self-Belay
The self-belay is an extremely important caving and climbing technique. The self-belay is essentially the use of an ascending device attached to a fixed rope or hand line. The most commonly used devices are the Gibbs, the Iumar, or a prusik knot. The ascending device is connected to the climber via his seat harness. As he climbs, he moves the ascender upward. The Gibbs is often rigged to move up following the caver, requiring little attention. If the caver falls, the ascender holds the fall. The Iumar cannot sustain high stresses or loads, so it should be rigged to catch the fall before any acceleration occurs, as acceleration would increase potentially disastrous forces.